
A DIY CNC (Computer Numerical Control) machine is a versatile tool that can be used for cutting, engraving, or milling various materials like wood, metal, plastic, and more. Building one from scratch requires careful planning, sourcing of components, assembly, and software setup. Below is a detailed guide to completing the project, including a timeline and checklist. Secondly, I propose another approach that I believe is more suitable for DIY hobbyists.
Timeline for a traditional production
Phase 1: Planning & Research (Weeks 1-2)
Tasks:
- Define Purpose and Scope: Decide what type of CNC machine you want to build (e.g., Mills, Lathes, Routers, Torch, plasma, laser cutting or 3D Printing).
- Research Designs: Look into existing designs and blueprints for inspiration in Open-Source and Community-Driven Projects.
- OpenBuilds: This is a fantastic resource with a large community. Their website has a “builds” section where users share their CNC machine designs, complete with photos, build logs, and discussions. Many of these projects use OpenBuilds’ own modular V-Slot and C-Beam components, which are also available for purchase on their site.
- Thingiverse: While known for 3D printer designs, Thingiverse also hosts many open-source designs for CNC machines. You can find everything from small desktop CNCs to larger, more robust machines. Look for projects that include a bill of materials (BOM), CAD files (like STL or DXF), and detailed instructions.
- Instructables: This site is a great source for step-by-step guides on a huge range of DIY projects, including CNC machines. Many users provide comprehensive instructions, parts lists, and even CAD files to help you build your own.
- IndyMill (indystry.cc): An open-source project focused on a DIY metal CNC machine. The website provides a complete parts list, build instructions (often through a series of YouTube videos), and downloadable files. They also sell some of the more difficult-to-source parts, like the laser-cut steel plates.
- GitHub: Many open-source hardware projects, including CNC machines, are hosted on GitHub. Searching for “DIY CNC machine” or similar terms can lead you to repositories with all the necessary design files, code (like GRBL), and documentation.
- Component Selection: Identify necessary parts such as motors, controllers, frames, etc.
- Budget Estimation: Determine your budget based on components needed.
Phase 2: Sourcing Materials & Components (Weeks 3-4)
Tasks:
- Purchase Frame Materials: Aluminum extrusions or steel are common choices.
- Order Electronics: Stepper motors, motor drivers, power supplies, control boards (like Arduino or Raspberry Pi).
- Acquire Tools: Ensure you have tools like screwdrivers, wrenches, drills, saws, etc.
- Software Setup: Download CNC control software (e.g., GRBL, Mach3, Fusion 360).
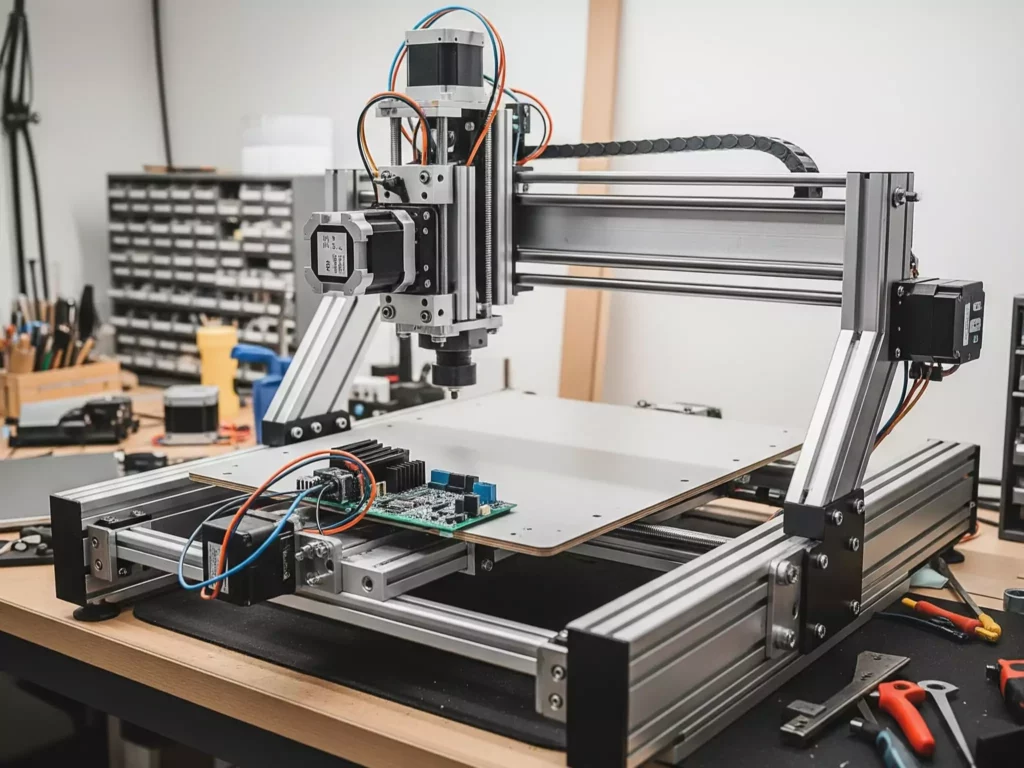
Phase 3: Assembly (Weeks 5-8)
Tasks:
- Frame Construction: Assemble the base structure using your chosen material.
- Install Linear Motion Systems: Attach rails, bearings, and lead screws for smooth movement.
- Mount Motors & Drivers: Secure stepper motors and connect them to drivers.
- Mount spindle Motor: adjust the spindle kinematics and wire the speed controller.
- Wire Electrical Components: Connect all electrical components ensuring proper wiring practices.
- Test Mechanical Movements: Verify that axes move freely without obstruction.
Phase 4: Software Configuration & Calibration (Weeks 9-10)
Tasks:
- Configure Control Board: Set up firmware on your controller board.
- Breakout bord:
- Calibrate Axes: Fine-tune settings for accurate positioning.
- Run Test Cuts/Engravings: Perform initial tests with scrap material to ensure functionality.
Phase 5: Optimization & Usage (After Week 10)
Tasks:
- Fine-Tune Settings: Adjust speeds, feeds, and other parameters as needed.
- Create Projects: Start working on actual projects once satisfied with performance.
- Maintenance Plan: Establish a routine for maintaining the machine.
Checklist Before Starting the Project
1. Define Your Goals
- [ ] What will this CNC machine primarily be used for? (e.g., wood carving, PCB milling, metal cutting)
- [ ] What size of work area do I need?
- [ ] Do I have space for the machine in my workshop?
2. Gather Resources
- [ ] Reviewed multiple CNC machine designs and selected one suitable for my needs.
- [ ] Created a comprehensive list of required components.
- [ ] Estimated total cost and ensured it fits within my budget.
3. Components List
- [ ] Frame Material (aluminum extrusion kit, steel beams, etc.)
- [ ] Stepper Motors (NEMA 17 or NEMA 23 depending on torque requirements)
- [ ] Motor Drivers (e.g., A4988, DRV8825, TMC2208)
- [ ] Power Supply Unit (PSU) appropriate for voltage/current needs
- [ ] Controller Board (Arduino Uno + GRBL shield, RAMPS, Smoothieboard, etc.)
- [ ] Lead Screws or Belts for linear motion
- [ ] End Mills or Bits specific to material being worked on
- [ ] Spindle/Laser/Plasma Torch (depending on application)
4. Tools Needed
- [ ] Measuring Tape/Ruler
- [ ] Screwdrivers (Phillips & Flathead)
- [ ] Allen Wrench Set
- [ ] Drill Press or Hand Drill
- [ ] Saw (Miter Saw recommended for cutting aluminum extrusions)
- [ ] Pliers and Wire Strippers
- [ ] Multimeter for troubleshooting circuits
5. Software Preparation
- [ ] Installed CAM software (Computer-Aided Manufacturing) like Fusion 360, Easel by Inventables, or VCarve.
- [ ] Installed G-code sender software (Universal Gcode Sender, bCNC, etc.)
- [ ] Learned basics of G-code programming if necessary.
6. Safety Precautions
- [ ] Understand safe operating procedures for machinery.
- [ ] Have protective gear ready (gloves, goggles, dust mask).
- [ ] Know emergency shutdown protocols.
By following this timeline and checklist, you’ll be well-prepared to tackle the DIY CNC machine project successfully. Remember, patience and attention to detail are key when assembling complex machinery.
Timeline adapted for DIY enthusiasts
Adopting an Iterative and Incremental Development (IID) approach while starting with zero-cost, software-based tasks (design, simulation, planning, virtual testing) is a way to de-risk your DIY CNC project, validate ideas early, and only spend money when you’re confident in your design.
Below is a revised Action Plan following IID principles, where Iterations 0–2 require no hardware purchases, and real investment begins only in Iteration 3 after you’ve validated your concept virtually. IID Action Plan : Software-First, Spend-Later
Overall Goal:
Build a functional, reliable DIY CNC router starting with free software work, then progressing to low-cost, validated hardware builds.
Iteration 0: Vision, Research & Virtual Scoping
Duration: 1–2 weeks | Cost: $0
Goal: Define what you’re building and why using only free tools and knowledge.
Key Activities:
- Clarify your use cases:
→ “I want to cut 6 mm plywood panels up to 400×400 mm.”
→ “I need ±0.2 mm accuracy for joinery.” - Research open-source CNC designs (MPCNC, Tiny CNC, Shapeoko clones, etc.)
- Study mechanical principles: belt vs. lead screw, rigidity, motor sizing
- List non-negotiable constraints: budget ceiling, workspace size, noise limits
- Create a project charter (1-page doc): goals, success criteria, risks
Deliverable:
✅ Clear project definition + list of functional requirements
✅ Decision: “I will build a belt-driven, GRBL-based CNC with a 500×500 mm work area.”
Iteration 1: Digital Design & Kinematic Modeling
Duration: 2–3 weeks | Cost: $0
Goal: Create a virtual prototype of your CNC machine.
Key Activities:
- Use free CAD software (Fusion 360 – free for hobbyists, FreeCAD, or Onshape) to:
- Model the frame, gantry, and motion system
- Assemble components virtually (even placeholder parts)
- Check for interferences and motion clearance
- Simulate basic kinematics:
- Will the Z-axis have enough travel?
- Are belts long enough? Is the gantry balanced?
- Calculate theoretical performance:
- Max speed based on motor torque & belt pitch
- Expected deflection under load (basic beam theory)
- Export a BOM (Bill of Materials)—for reference only, no buying yet
Deliverable:
✅ 3D CAD assembly of your CNC concept
✅ Basic performance estimates (speed, travel, load capacity)
Iteration 2: Virtual G-code & Motion Simulation
Duration: 1–2 weeks | Cost: $0
Goal: Validate that your design can execute real cutting jobs—before building it.
Key Activities:
- Use free CAM software (Fusion 360, Carbide Create, or bCNC with simulation plugins)
- Generate G-code for a sample job (e.g., engrave your name, cut a pocket)
- Simulate toolpaths in context of your CAD model:
- Does the tool collide with the frame?
- Is the work area sufficient?
- Are rapid moves safe?
- Test GRBL settings virtually:
- Use GRBL Simulator or CNCjs with virtual machine mode
- Tune acceleration, steps/mm, and max feedrate in software
- Document expected cutting parameters (feed, depth/pass, spindle RPM)
Deliverable:
✅ Verified toolpath that would work on your designed machine
✅ Confident GRBL configuration file (config.h settings or $ parameters)
Iteration 3: First Hardware Build – Minimal Viable CNC
Duration: 3–5 weeks | Cost: Minimal ($100–$250)
Goal: Build the simplest version that can move and make shallow marks.
Now it’s time to buy—but only what’s essential:
- Reuse materials if possible (aluminum extrusion from old projects, wood scraps)
- Prioritize motion system + brain:
- Stepper motors (NEMA 17)
- Arduino UNO + CNC Shield (or pre-flashed GRBL board)
- GT2 belts & pulleys (or repurpose from 3D printer)
- Linear motion: smooth rods + LM8UU bearings (low-cost start)
- Skip spindle at first—use a marker or scribe for “dry runs”
Activities:
- Assemble mechanical structure based on your CAD
- Wire electronics and flash GRBL
- Calibrate steps/mm, test jogging, run simulated G-code
- Perform “air cuts” or mark paper/wood with a pen
Deliverable:
✅ A working 3-axis motion platform that executes G-code
✅ First physical validation of your virtual design
Iteration 4+: Incremental Hardware Upgrades
Now spend strategically—guided by real-world feedback:
- Add spindle → test real cuts → measure deflection → reinforce frame
- Add limit switches → enable homing → improve repeatability
- Replace rods with rails → reduce play → improve surface finish
- Add dust shoe → enable longer sessions
Each upgrade is small, tested, and justified by prior iteration’s shortcomings.
Benefits of This “Software-First” IID Approach:
- $0 spent during concept validation
- Fail fast, learn cheap: fix design flaws in CAD, not with broken parts
- Confident purchasing: you know exactly what you need
- Strong documentation: your CAD, G-code, and configs become your build guide
- Community sharing: you can publish your design before building it for feedback
Free Tools to Use:
| Task | Tool |
|---|---|
| CAD | Fusion 360 (free for personal use), FreeCAD |
| CAM | Fusion 360, Carbide Create (free version) |
| G-code Sim | CAMotics, CNCjs (with simulator), Universal G-code Sender (dry run) |
| Motion Logic | GRBL (open-source), GRBL-Plotter (simulation) |
| Planning | Notion, Obsidian, GitHub (for BOM & logs) |
By starting in the digital realm, you transform your CNC project from a gamble into a guided evolution where every dollar spent is backed by simulation, planning, and proof.
Now go model, simulate, and validate your future self (and your wallet) will thank you!