
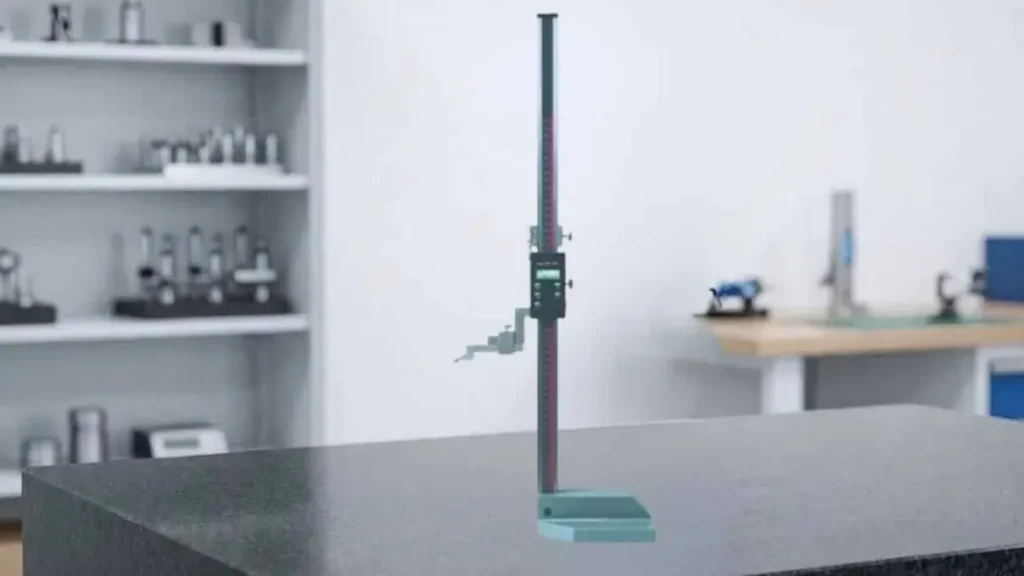
In the world of machining, manufacturing, and quality control, the phrase “close enough” is the enemy. When tolerances are measured in microns or ten-thousandths of an inch, you need tools that deliver absolute certainty.
Enter the height gauge the unsung hero of the inspection bench.
Whether you are checking the dimensions of a freshly milled part, calculating the center distance between two holes, or scribing layout lines on a block of raw steel, the height gauge is your go-to instrument. But how much do you really know about this essential metrology tool?
Let’s dive into everything you need to know about height gauges, from their basic anatomy to pro-tips for getting the most accurate measurements.
What is a Height Gauge?
At its core, a height gauge is a precision measuring instrument used to determine the vertical height of an object or to mark out lines for machining.
However, there is one golden rule you must never forget: A height gauge is only as accurate as the surface it sits on. It is designed exclusively to be used on a precision ground surface plate (usually granite). Using a height gauge on a standard workbench or machine table will yield inaccurate results, as those surfaces are not guaranteed to be perfectly flat.
The Anatomy of a Height Gauge
While designs vary, almost all manual height gauges share the same basic components:
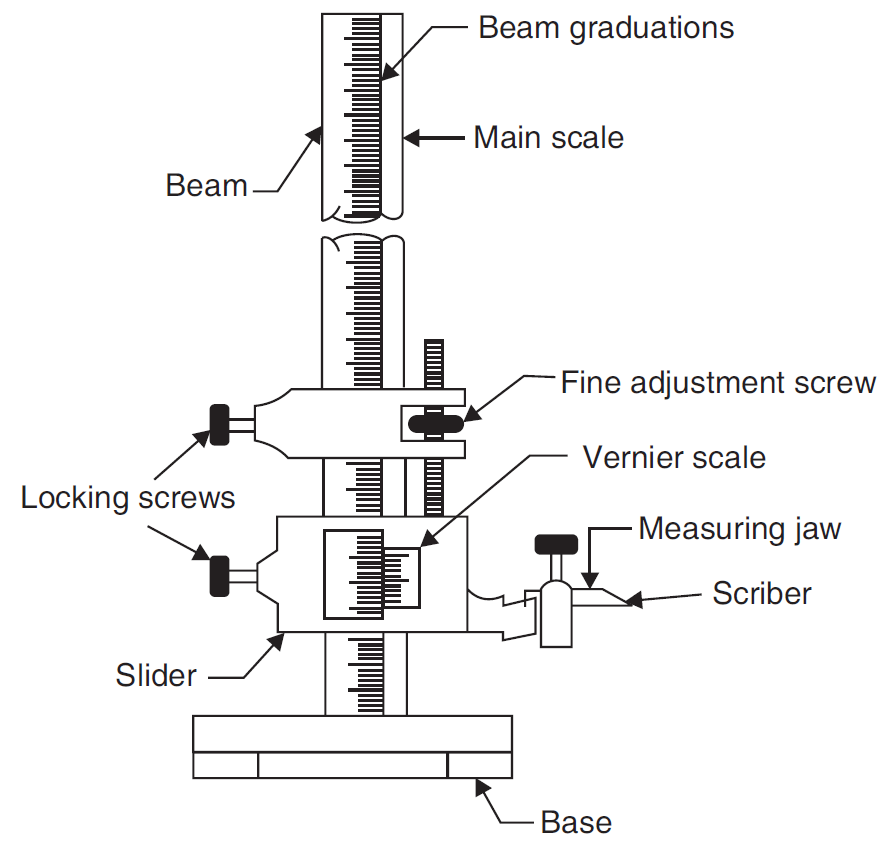
- The Base: A heavy, flat, and stable foundation (often cast iron or granite) that provides the reference plane. It usually features a fine-adjustment knob on the side.
- The Column: The vertical spine that guides the slider. It must be perfectly perpendicular to the base.
- The Slider (Carriage): The mechanism that moves up and down the column. It contains the locking mechanism and the fine-feed micro-adjustment.
- The Measuring Jaw / Scriber: The “business end” that contacts the part. It can be a flat anvil for measuring, a pointed carbide tip for scribing, or a specialized depth rod.
- The Scale: The ruler that tells you the measurement. This is where the different types of height gauges diverge.
Types of Height Gauges
Height gauges have evolved significantly over the decades. Here are the three main types you’ll find in a modern shop:
1. Vernier Height Gauge (The Classic)
The traditionalist’s choice. It uses a vernier scale to provide highly accurate readings without the need for batteries.
- Pros: Extremely durable, no electronics to fail, immune to coolant or oil.
- Cons: Prone to parallax error (reading the scale from an angle), requires a trained eye to read quickly.
2. Dial Height Gauge
These feature a mechanical dial indicator attached to the slider. As the slider moves, a rack-and-pinion gear turns the needle on the dial.
- Pros: Much easier and faster to read than a vernier scale; excellent for comparative measurements (checking for runout or variation).
- Cons: The dial can be knocked out of zero if bumped; limited measuring range compared to the main scale.
3. Digital / Electronic Height Gauge
The workhorse of the modern inspection room. These use a linear encoder inside the column to track movement and display the measurement on an LCD screen.
- Pros: Incredibly easy to read, allows for absolute and incremental (relative) measurements, features one-button zeroing, and can output data directly to SPC (Statistical Process Control) software via USB or wireless.
- Cons: Requires batteries, sensitive to extreme temperature changes, and generally more expensive.
(Note: For high-end manufacturing, CNC Height Gauges exist, which use touch probes and motors to automatically map 2D and 3D geometries, but they are a different beast entirely!)
What Can You Measure?
A height gauge is incredibly versatile. With the right attachments and a bit of math, you can measure:
- Overall Height: The distance from the surface plate to the top of a part.
- Step Heights: The difference in height between two levels on a single part.
- Hole Depths: By using a depth attachment (a thin rod that extends below the base), you can measure the depth of blind holes or counterbores.
- Center-to-Center Distances: By measuring the top and bottom of a hole, you can calculate its exact center. (Many digital gauges even have a built-in “Center-to-Center” function that does the math for you!).
- Scribing: Swap the measuring jaw for a carbide-tipped scribe, and you can scratch precise layout lines onto raw stock before machining.
5 Pro-Tips for Perfect Measurements
Even the most expensive digital height gauge will give you bad data if used incorrectly. Keep these best practices in mind:
1. Respect the Surface Plate
Always clean the surface plate and the base of the height gauge before use. A single metal shaving or speck of dust trapped under the base will ruin your measurement. Never slide the base across the plate; lift and place it.
2. Mind the Temperature
Thermal expansion is real. If you bring a cold steel part into a warm inspection room, it will expand, giving you a false reading. Allow parts and the gauge to acclimate to room temperature (usually 20°C / 68°F) before measuring.
3. Use the Fine Adjustment
Never just drop the slider down onto a part. Bring the measuring jaw close to the surface, lock the carriage, and use the fine-feed knob to gently lower the jaw until it just “kisses” the part.
4. Beware of Overhang (The Abbe Principle)
Try to keep the measuring jaw as close to the column as possible. If you extend the jaw too far out, the slight flex in the slider and the angle of the jaw can introduce cosine errors.
5. Zero it Properly
Before measuring, always “zero” the gauge on the surface plate. For digital gauges, lower the jaw to the plate and hit the zero button. For vernier gauges, ensure the zero marks align perfectly. If they don’t, note the offset and apply it to your final reading.
The Final Word
The height gauge is a testament to the beauty of precision engineering. It takes the guesswork out of layout and inspection, ensuring that every part you make fits perfectly into the grand assembly.


